Manage RDP certificates on Windows using SSH
Windows can use normal TLS certificates to authenticate RDP sessions. This gets rid of the annoying RDP certificate warnings:
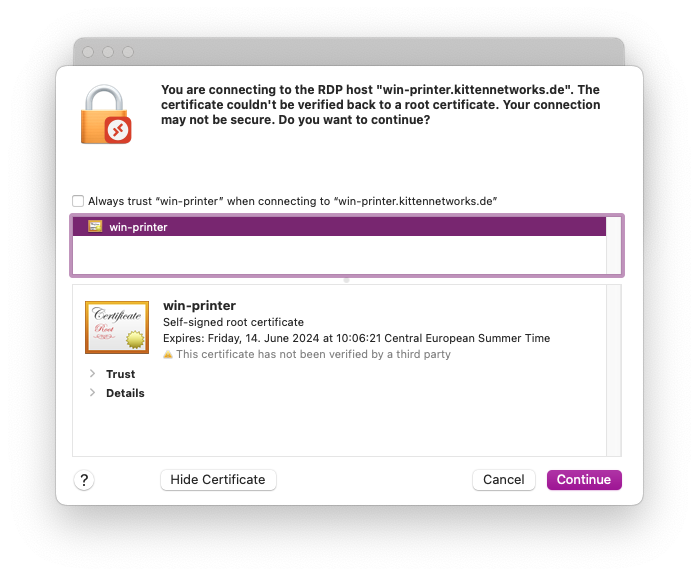
Using real, signed certificates for RDP offers a way to enhance security (preventing man-in-the-middle attacks) and reduce alert fatigue.
Note:
If you’re using ACME/Let’s Encrypt locally on Windows, skip all SSH stuff and just take some inspiration from thecertimport.ps1 file.Prerequisites
- SSH-capable machine with valid certificates (self-signed, Let’s Encrypt, etc.)
- SSH private/public key pair on that machine
- Modern Windows installation (Windows 11 Pro was tested)
- Hostnames for the Windows machine
Install OpenSSH server
Read through the following help pages:
tl;dr:
# Install the OpenSSH Client
Add-WindowsCapability -Online -Name OpenSSH.Client~~~~0.0.1.0

# Install the OpenSSH Server
Add-WindowsCapability -Online -Name OpenSSH.Server~~~~0.0.1.0

# Confirm the Firewall rule is configured. It should be created automatically by setup. Run the following to verify
if (!(Get-NetFirewallRule -Name "OpenSSH-Server-In-TCP" -ErrorAction SilentlyContinue | Select-Object Name, Enabled)) {
    Write-Output "Firewall Rule 'OpenSSH-Server-In-TCP' does not exist, creating it..."
    New-NetFirewallRule -Name 'OpenSSH-Server-In-TCP' -DisplayName 'OpenSSH Server (sshd)' -Enabled True -Direction Inbound -Protocol TCP -Action Allow -LocalPort 22
} else {
    Write-Output "Firewall rule 'OpenSSH-Server-In-TCP' has been created and exists."
}
Configure OpenSSH server
Open C:\ProgramData\ssh\sshd_config with a text editor running as Administrator (Notepad++ works well) and disable password logins.
Find the following line:
#PasswordAuthentication yes
and change it to:
PasswordAuthentication no
Create C:\ProgramData\ssh\administrators_authorized_keys and put the SSH public key of the deploy box into the file.
Warning! Unix line-endings!
Ensure you save the authorized_keys file with Unix (LF) line endings!When you insert multiple keys with Windows line endings, OpenSSH fails to parse the file and won’t accept any keys!
Notepad++ can do this under Edit -> EOL Conversion -> Unix (LF).
Open a shell with administrator/elevated permissions and run:
icacls.exe "C:\ProgramData\ssh\administrators_authorized_keys" /inheritance:r /grant "Administrators:F" /grant "SYSTEM:F"
to set the permissions of the authorized_keys file to be only accessible by SYSTEM and the administrative group.
Localization
The group “Administrators” might be called differently on your machine, depending on the locale you’re using.
When in doubt, run lusrmgr.msc and check the group name.
On german Windows installations, the group is called “Administratoren”. This changes the argument to:
icacls.exe "C:\ProgramData\ssh\administrators_authorized_keys" /inheritance:r /grant "Administratoren:F" /grant "SYSTEM:F"
Then start and enable the sshd service:
# Start the sshd service
Start-Service sshd

# Autostart sshd
Set-Service -Name sshd -StartupType 'Automatic'
Test SSH connection
Try to log onto the windows machine from your deploy box:
ssh myuser@windowsbox.example.com
Acknowledge the fingerprint warning and check if you get dropped into a cmd.exe shell.
certimport.ps1
On our deploy box, we’ll create a PowerShell script called certimport.ps1. Change example.com to the CN of your certificate. The certificate can have more hosts in the SAN fields, but the CN is used for managing/cleanup of old certificates.
$domain = "example.com"

# Import pkcs.pfx into the local key store
$pfxfile = "pkcs.pfx"
$CertificatePassword = ""
$certRootStore = "LocalMachine"
$certStore = "My"
$pfx = New-Object System.Security.Cryptography.X509Certificates.X509Certificate2
$pfx.Import($pfxfile,$CertificatePassword,"Exportable,PersistKeySet,MachineKeySet")
$store = New-Object System.Security.Cryptography.X509Certificates.X509Store($certStore,$certRootStore)
$store.Open('ReadWrite')
$store.Add($pfx)
$store.Close()
$certThumbprint = $pfx.Thumbprint

# Set RDP certificate thumbprint to the new certificate
wmic /namespace:\\root\cimv2\TerminalServices PATH Win32_TSGeneralSetting Set SSLCertificateSHA1Hash="$certThumbprint"

Write-Output $pfx.Thumbprint

# Remove all old certificates from LetsEncrypt, for this domain and not using the new thumbprint
$date = Get-Date
$store = New-Object System.Security.Cryptography.X509Certificates.X509Store($certStore,$certRootStore)
$store.Open('ReadWrite')
foreach($cert in $store.Certificates) {
  if($cert.Subject -eq "CN=$domain" -And $cert.Issuer.Contains("Let's Encrypt") -And $cert.Thumbprint -ne $certThumbprint) {
    Write-Log "Removing certificate $($cert.Thumbprint)"
    $store.Remove($cert)
  }
}
$store.Close()
Renew script
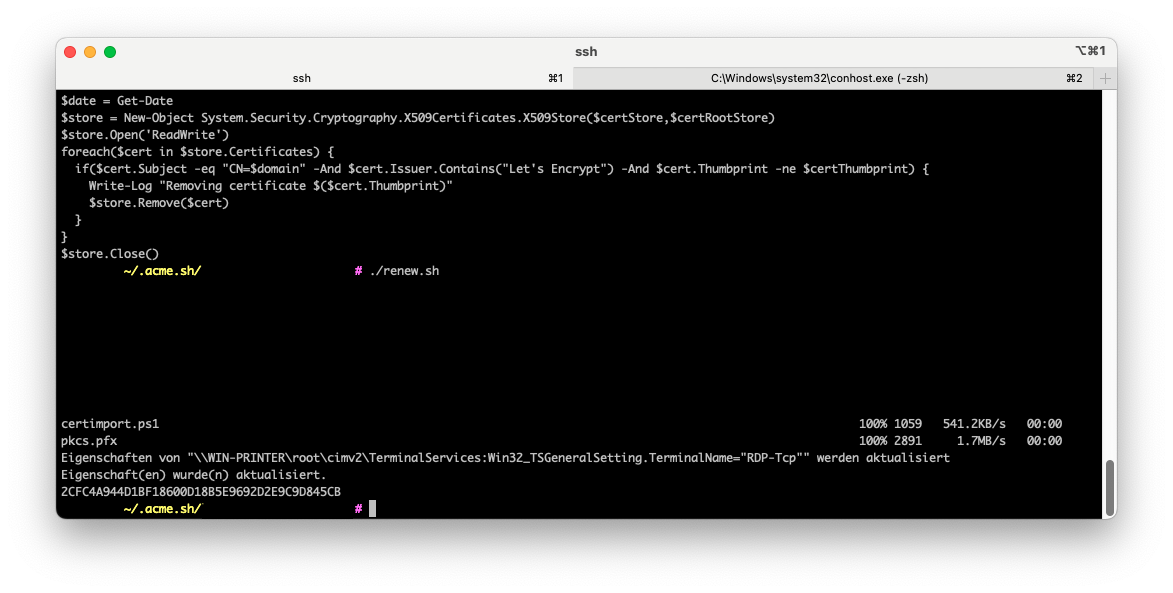
To upload the certificate to the windows box, run the following commands (manually or in your renew script):
openssl pkcs12 -passout pass: -keypbe NONE -certpbe NONE -nodes -export -out pkcs.pfx -in /home/acme/.acme.sh/example.com/fullchain.cer -inkey /home/acme/.acme.sh/example.com/example.com.key
scp certimport.ps1 myuser@windowsbox.example.com:
scp pkcs.pfx myuser@windowsbox.example.com:
ssh myuser@windowsbox.example.com "powershell ~/certimport.ps1 && del certimport.ps1 && del pkcs.pfx"
OpenSSL takes the full certificate chain (certificate + intermediate certs) and the private key and converts them into a PKCS12/PFX file.
SCP/SFTP is used to copy both the certimport.ps1 script and the pkcs.pfx certificate to the Windows machine.
The final SSH command then:
- runs the powershell script
- imports the certificate
- sets the thumbprint for RDP
- removes old certificates from Let’s Encrypt, with the same CN/domain and a different thumbprint
- cleans itself and the certificate file up
Troubleshooting
You can run certlm.msc to check the imported certificates:
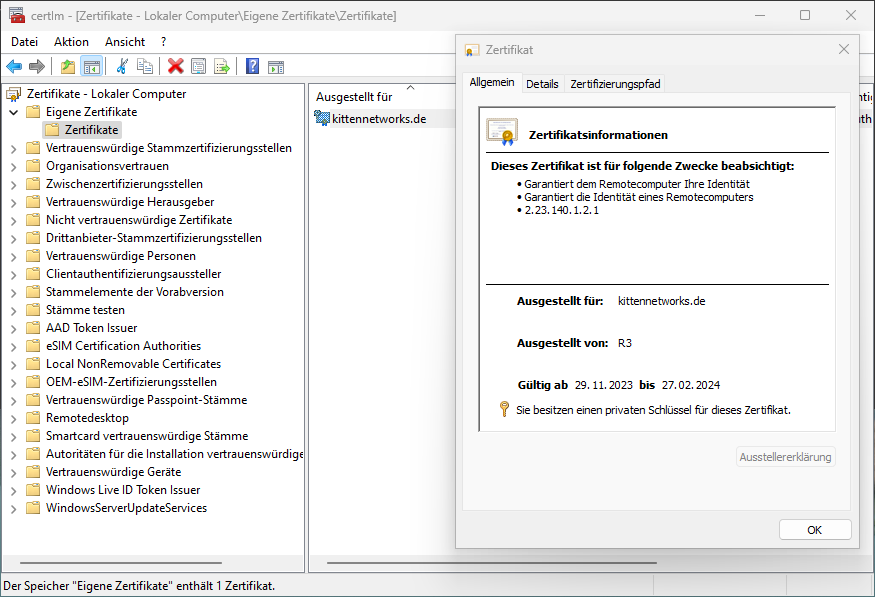
At the bottom of the “details” tab, the SHA1 fingerprint is shown:

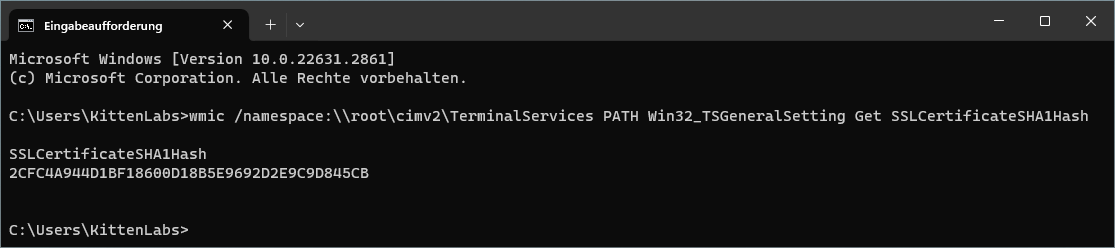
You can check the currently configured RDP fingerprint by running:
wmic /namespace:\\root\cimv2\TerminalServices PATH Win32_TSGeneralSetting Get SSLCertificateSHA1Hash